
Da Capo Inventory includes a Form Collection feature that allows teachers to mark forms as received. While parents cannot upload completed forms directly, this tool provides a simple way to track—at a glance—which students have submitted required forms or handbooks, and which still owe them.
To use the function, please use the following steps:
Create a Form #
- Create a Form
- Enter the Form Name and Due Date.
- Choose whether to make the blank form available for parents to download in the Parent Portal.
- Upload a PDF copy of the blank form.
- Manage the Form
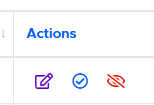
- At the bottom of the page, you will see several options:
- Edit – Change the form’s title or due date.
- Blue Check – Open the Collect Forms page for that form.
- Hide – Remove the form from your active list without deleting it.
- At the bottom of the page, you will see several options:
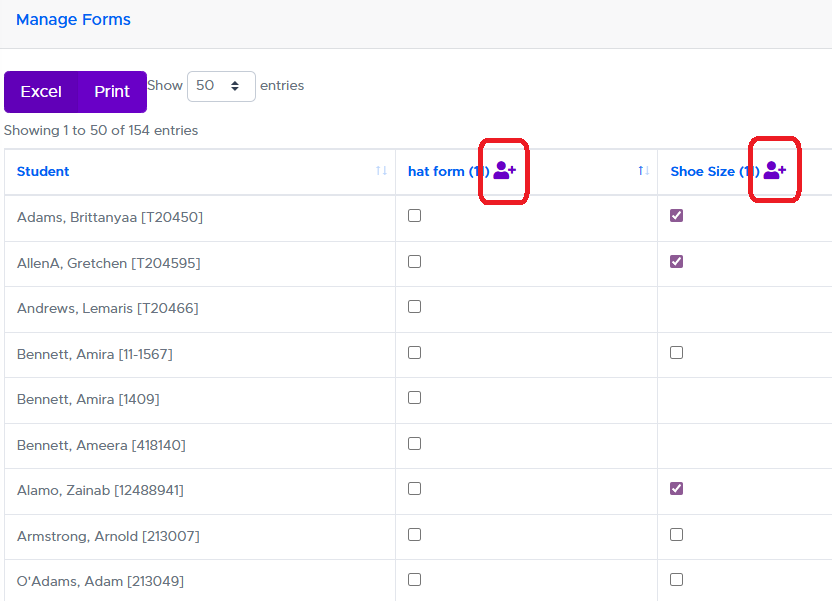
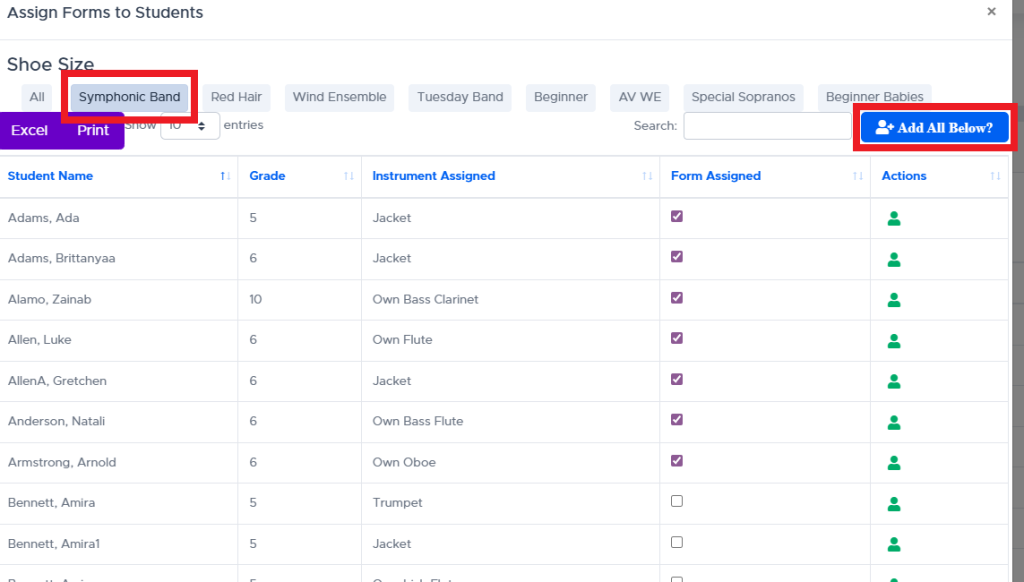
Assigning Forms to Students #
Before you can collect a form, it must be assigned to students:
- On the Manage Forms page, click the purple “Student Plus” button.
- In the popup window, select individual students or use “Add All Students Below” to assign the form to all students in that group.
- Close the popup (via the Close button or by clicking outside the window). The page will refresh, and the form will be assigned to the selected students.
Collect Forms #
Once a form has been assigned, you can mark it as collected:
- Manual Check-Off – Use the checkboxes next to each student’s name to mark forms as received.
- Barcode Scanning – If you attach student barcodes to forms before distribution, you can quickly scan them with a barcode scanner. This provides a fast, efficient way to update collection records.
✅ Tip: Using barcodes is the quickest method for handling large groups of students.